Hi there Mellionaire House friends!
Today I’ve teamed up with the King of Christmas, and a fabulous group of bloggers to share a little Christmas in July inspiration (and a giveaway of a King of Christmas Tree, valued at $500). If you’re coming over from The Curated Farmhouse, I’d like to extend you a warm “hello,” and thanks for stopping by! My name is Melonie, and I’m design enthusiast who shares on all things home décor, lifestyle and family. But there’s a very special place in my heart for Christmas.
Speaking of Christmas…now, I realize that it was 92 degrees yesterday here is sunny Tampa bay. And I also realize that most of you are still hanging on to those last weeks of summer. But in the blogosphere world, we are already thinking about how to inspire you for the 2018 holiday season. For Christmas 2017, I tried something that I’d never done before. I removed all red out of the main tree design, and created my first Rustic Glam Christmas tree. And my friends, it was nothing short of magical.
So today I’m sharing a few tips on how to style a Christmas tree, no matter what colors you use, and I hope that you find it helpful.
Choose a color scheme – Sounds simple, right? But it’s something that I find many of my holiday styling clients never think about, and it can become a point of contention for them. It’s simple though, really. Are you Team Red, or Team Neutral? Do you like colors that reflect your personality, or do you prefer a nostalgic tree that reminds you of your childhood? Once you choose you colors, pick one color as a main color, and add 2-3 accent colors. Last year, I choose cream, gold and browns for my rustic glam tree.


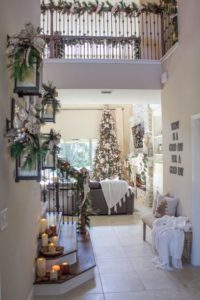
Start from the top and work your way down – Decorating my first 13 ft tree was a complete nightmare. I had NO idea how many ornaments I needed, and I waited until I was completely done decorating the tree to try to put the tree topper on. BIG MISTAKE. I knocked off so many glass ornaments up there on that ladder trying to put the topper on…it was really funny, actually. But not at the time. So after that year, I learned to add and style my tree topper first, and then work my way down. If your tree is not pre-lit, add your lights, followed by garland/ribbon. Next, I add my largest ornaments first, or my “anchor ornaments,” followed by my medium sized and then smallest ornaments.

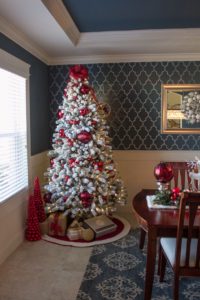
For a dramatic look, I stuck with all red ornaments on last year’s King of Christmas tree, starting with the largest ornaments first.

Consider gift wrapping as part of the tree décor – it’s a very simple way to complement all the work you’ve done on your beautiful tree, and I find that it even makes the gifts look more appealing too.

I hope you found a tip you can use for Christmas 2018! I’d love for you to check out the video series I shared last year on my YouTube channel with 12 days of Christmas ideas and inspiration for you!
Next you’ll want to hop on over to visit Jordan at A Blue Nest! And below you’ll find a list of all the bloggers in this hop and an opportunity to enter the giveaway. Thanks again for stopping by, and a sincere thank you to King of Christmas for sponsoring this blog hop!
Until next time…love & peace.
~Melonie


I absolutely love your rustic glam look! Wonderful palette!!